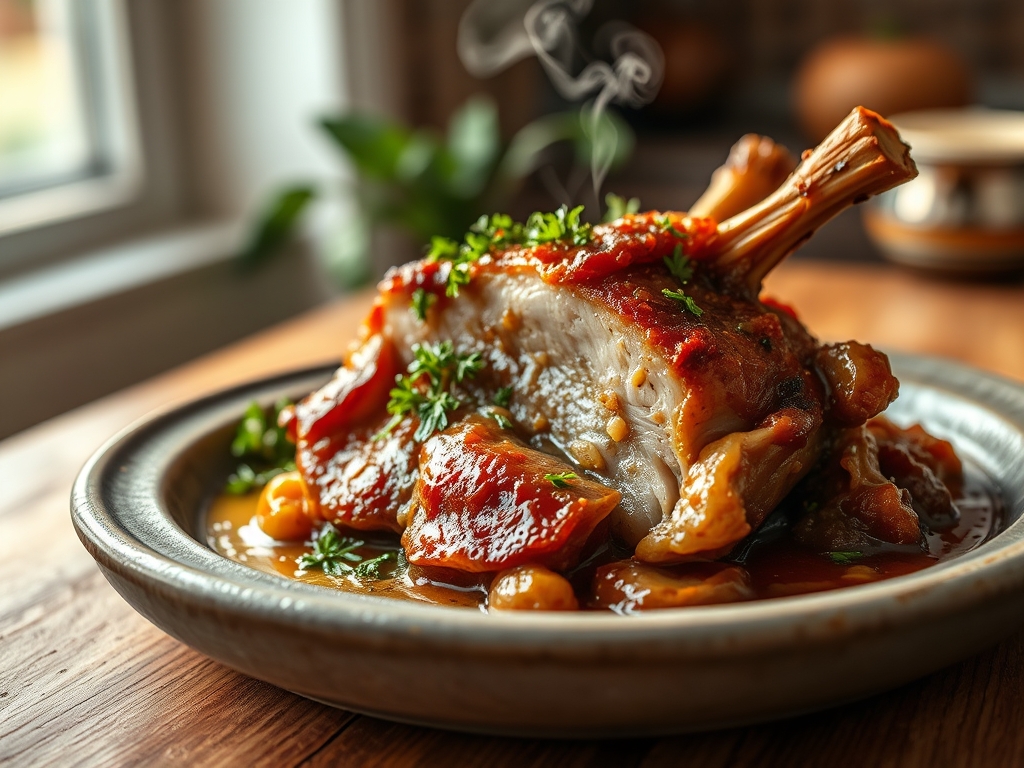
Listen up, flavor engineers. We are not just cooking dinner; we are conducting a structural overhaul of porcine connective tissue. The Braised Pork Knuckle is the undisputed heavyweight champion of the culinary infrastructure world. It is a masterpiece of epidermal lipid rendering where tough, stubborn collagen undergoes a thermal metamorphosis into a viscous, lip-smacking lacquer. When you do this right, the meat does not just fall off the bone; it surrenders. We are looking for a deep, mahogany sheen that reflects the kitchen lights like a polished sports car. The skin must be supple yet intact, holding back a reservoir of rich, gelatinous glory that coats the palate and demands a second helping. This is high-stakes chemistry disguised as comfort food. If your Braised Pork Knuckle looks pale or feels rubbery, you have failed the audit. We are here to ensure your kitchen produces nothing less than a structural marvel of salt, sugar, heat, and fat. Strap in, calibrate your scales, and let us begin the rendering process.
THE DATA MATRIX
| Metric | Specification |
|---|---|
| Prep Time | 45 Minutes |
| Execution Time | 3.5 Hours |
| Yield | 4 Servings |
| Complexity (1-10) | 7 |
| Estimated Cost per Serving | $6.50 |
THE GATHERS
Ingredient Protocol:
- 2.2kg / 5lbs Pork Knuckle (Hock), skin-on and bone-in.
- 1.5L / 6 cups Water or unsalted pork stock.
- 120ml / 0.5 cup Light soy sauce.
- 60ml / 0.25 cup Dark soy sauce (for pigment density).
- 80g / 0.33 cup Rock sugar (for superior gloss).
- 50ml / 3 tbsp Shaoxing rice wine.
- 50g / 2oz Fresh ginger, smashed.
- 6 cloves Garlic, crushed.
- 3 pieces Star anise.
- 1 stick Cinnamon (Cassia bark).
- 5g / 1 tsp Sichuan peppercorns.
- 20ml / 1.5 tbsp Neutral oil (high smoke point).
Section A: Ingredient Quality Audit:
The primary failure point in this infrastructure project is sub-par pork. If the knuckle smells "funky" or displays a greyish tint, the lipid profile is already degrading. Technical fix: Always perform a cold-water soak for 60 minutes to extract residual blood and impurities. If your rock sugar is unavailable, substitute with granulated sugar but add a teaspoon of honey to mimic the viscous sheen. For aromatics that lack punch, aerate them by lightly bruising in a mortar and pestle before they hit the heat. This ensures the essential oils infuse the braising liquid immediately rather than stalling out during the simmer.
THE MASTERCLASS
Step 1: The Blanching Protocol
Submerge the pork knuckle in a large pot of cold water. Bring to a rolling boil for 10 minutes. Use a stainless steel skimmer to remove the grey foam (denatured proteins) that rises to the surface. Drain and rinse the knuckle under cold running water. Pro Tip: Starting with cold water allows the pores to stay open longer; this draws out more impurities than dropping meat into boiling water. Use a bench scraper to remove any remaining hair or debris from the skin surface after blanching.
Step 2: The Maillard Lacquer
In a heavy-bottomed saucier or Dutch oven, heat the oil and rock sugar over medium heat. Stir constantly until the sugar melts into a deep amber caramel. Carefully add the pork knuckle, turning it to coat the skin in the molten sugar. Pro Tip: This is "Red Cooking" science. The caramelization provides the base color and a piquant depth that soy sauce alone cannot achieve. Use a digital scale to ensure your sugar-to-liquid ratio is precise; too much sugar will scorch before the meat is tender.
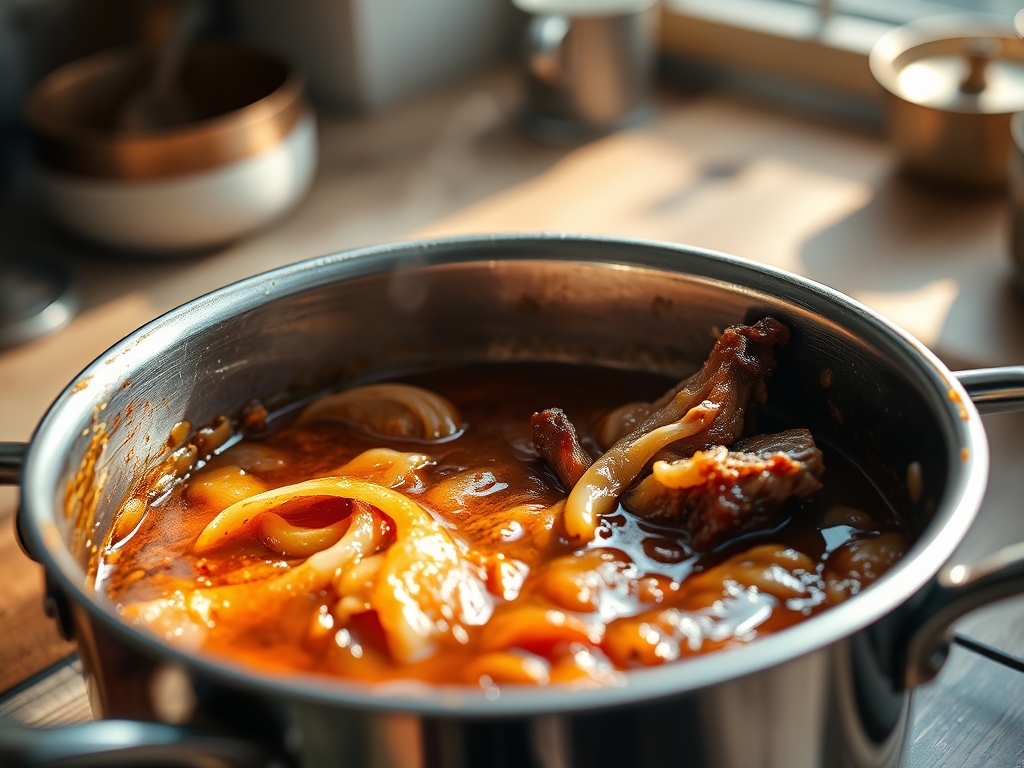
Step 3: The Aromatic Infusion
Add the ginger, garlic, star anise, cinnamon, and peppercorns to the pot. Stir for 60 seconds until fragrant. Pour in the Shaoxing wine to deglaze the bottom of the pan, scraping up any caramelized bits. Add both soy sauces and the water/stock until the knuckle is 75 percent submerged. Pro Tip: Deglazing captures the fond (browned bits), which contains the highest concentration of flavor molecules. An offset spatula can help reach the corners of the pot to ensure no flavor is left behind.
Step 4: The Low-Velocity Simmer
Bring the liquid to a boil, then immediately reduce to a whisper-thin simmer. Cover tightly. Cook for 2.5 to 3 hours, turning the knuckle every 45 minutes. Pro Tip: High heat toughens muscle fibers. A low, slow simmer allows the collagen to render into gelatin without the meat becoming stringy. Use a digital probe thermometer to check for an internal temperature of 95C (203F), which is the sweet spot for total connective tissue breakdown.
Step 5: The Reduction Phase
Remove the lid and increase the heat. Baste the pork continuously with the braising liquid as it reduces into a thick, viscous glaze. Pro Tip: The glaze is ready when it coats the back of a spoon. If the sauce remains too thin, remove the meat and use a high-sided skillet to reduce the liquid faster, then pour it back over the knuckle for the final presentation.
Section B: Prep & Timing Fault-Lines:
The most common human error is the "Rushed Render." If you crank the heat to save an hour, the exterior skin will disintegrate while the interior remains tough. If you find yourself behind schedule, use a pressure cooker for 45 minutes, but you must finish the pork in an open pan to achieve the correct visual lacquer. Another fault-line is the "Salt Spike." As the liquid reduces, the salinity intensifies. Always under-season at the start; you can add salt at the end, but you cannot remove it once the molecular bond is formed.
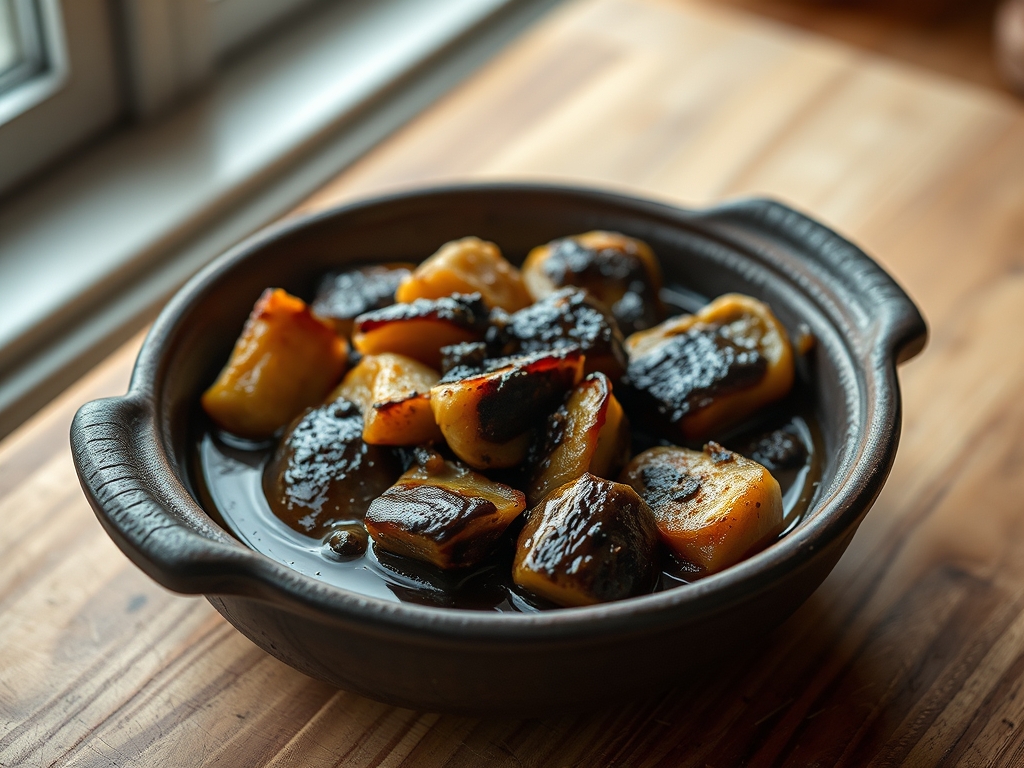
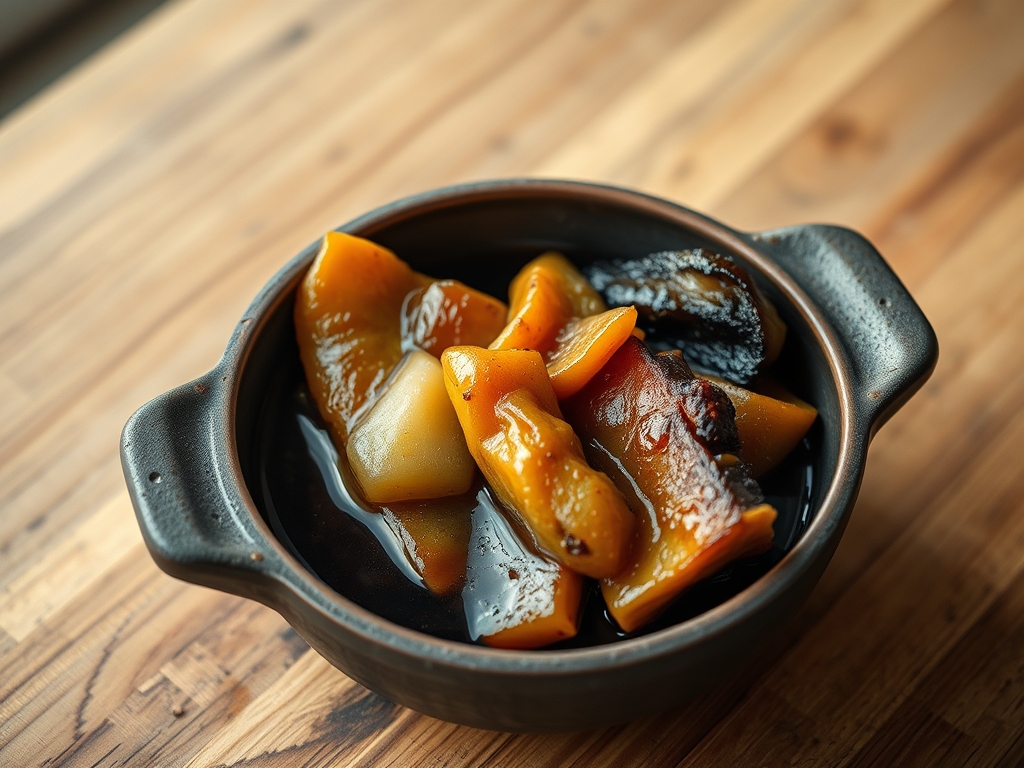
THE VISUAL SPECTRUM
Section C: Thermal & Visual Troubleshooting:
Referencing the Masterclass photo, your Braised Pork Knuckle should exhibit a "mirror glaze" effect. If your dish looks dull or matte, you likely skipped the sugar caramelization step or failed to reduce the sauce sufficiently. If the skin is bursting or ragged, your simmer was too aggressive; next time, use a heat diffuser. For uneven browning, ensure the knuckle is rotated frequently during the simmer. The final product should be a deep, mahogany red. If it is too light, increase the dark soy sauce by 10ml in your next iteration to provide more pigment density.
THE DEEP DIVE
Macro Nutrition Profile:
This dish is a powerhouse of healthy fats and protein. A standard serving contains approximately 450 calories, 35g of protein, and 32g of fat. It is exceptionally high in glycine and proline due to the rendered collagen.
Dietary Swaps:
- Vegan: Substitute pork with large chunks of "Lion's Mane" mushroom or taro root. Use liquid aminos instead of soy sauce.
- Keto: Replace rock sugar with a monk fruit erythritol blend. The glaze will be less shiny but the flavor remains intact.
- GF: Ensure you use Tamari or certified Gluten-Free soy sauce.
Meal Prep & Reheating Science:
To maintain the molecular structure, store the pork in its own braising liquid. This prevents the surface from dehydrating. When reheating, do not use a microwave; the uneven waves will turn the gelatin rubbery. Instead, steam the knuckle or reheat it gently in a covered pot with a splash of water to re-emulsify the fats.
THE KITCHEN TABLE
Why is my sauce not shiny?
Shiny sauces require the emulsification of gelatin and sugar. If your sauce is dull, reduce it further or add a small knob of cold butter at the very end to create a glossy, professional finish.
Can I use a slow cooker?
Yes, but the infrastructure will suffer. Slow cookers do not allow for evaporation, meaning your sauce will be thin. You must reduce the liquid in a separate pan on the stove after the slow-cooking cycle finishes.
The meat is tender but the skin is tough?
This indicates the pork was not blanched long enough or the simmering liquid did not contain enough acidity. A tablespoon of black vinegar can help soften the skin fibers during the long braise.
How do I store leftovers?
Place the knuckle in a glass container and cover completely with the sauce. It will form a "aspic" or jelly in the fridge. This protects the meat from oxidation for up to four days.