Smoke is not just a flavor; it is a structural component of the culinary atmosphere. When we talk about Burnt Ends Infrastructure, we are discussing the architectural stability of collagen breakdown and the strategic deployment of sugar carbonization. This is the apex of barbecue engineering. We are looking for that specific point where the brisket point or chuck roast transitions from a tough muscle group into a series of gelatinous, bark-covered cubes of pure lipid joy. It requires a mastery of thermal dynamics and a deep understanding of how moisture migrates through protein fibers under sustained heat. You are not just cooking dinner; you are managing a high-heat chemical reaction that demands precision, patience, and the right equipment. The goal is a crust that shatters slightly before yielding to a center that is practically molten. If your bark is mushy or your fat hasn't fully rendered into a viscous glaze, your infrastructure has failed. Let's rebuild it from the ground up with technical authority.
THE DATA MATRIX
| Metric | Specification |
|---|---|
| Prep Time | 45 Minutes |
| Execution Time | 6 to 8 Hours |
| Yield | 6 to 8 Servings |
| Complexity (1-10) | 8 |
| Estimated Cost per Serving | $7.50 |
THE GATHERS
Ingredient Protocol:
- 2.7kg / 6 lbs Beef Brisket Point or Chuck Roast
- 60ml / 4 tbsp Coarse Kosher Salt
- 60ml / 4 tbsp Coarse Black Pepper (16 mesh)
- 15ml / 1 tbsp Granulated Garlic
- 250ml / 1 cup High-Quality BBQ Sauce (Low vinegar, high sugar)
- 115g / 1/2 cup Unsalted Butter (Cubed)
- 60ml / 4 tbsp Honey or Agave Nectar
- 120ml / 1/2 cup Beef Bone Broth
Section A: Ingredient Quality Audit:
The primary failure point in Burnt Ends Infrastructure is the selection of lean protein. If you choose a select-grade cut with minimal intramuscular fat, the end result will be fibrous and dry rather than succulent. Technical Fix: Always source Choice or Prime grade beef. Look for heavy marbling within the muscle fibers. If you find yourself with a lean cut, you must compensate by injecting a tallow-based emulsion or increasing the viscous nature of your braising liquid. Another common audit failure is using fine-table salt. This leads to over-salting and a lack of crust texture. Use coarse salt to ensure the Maillard reaction has the surface area it needs to thrive.
THE MASTERCLASS
1. The Surface Preparation and Rub Application
Begin by trimming the excess hard fat from the beef using a sharp boning knife. You want to leave approximately 6mm of fat cap to protect the meat during the long thermal exposure. Apply your dry rub using a digital scale to ensure precise ratios. Coat the meat evenly on all sides.
Pro Tip: Use the "dry brine" method by seasoning the meat 12 hours in advance. This allows the salt to penetrate the protein structure via osmosis, which seasons the meat deeply and alters the protein strands to retain more moisture during the smoke.
2. The Initial Thermal Phase
Set your smoker to 107 degrees Celsius (225 degrees Fahrenheit). Place the beef in the center of the cooking grate. This phase is about the slow render of connective tissues. Use a dual-probe digital thermometer to monitor both the ambient pit temperature and the internal meat temperature.
Pro Tip: The science of "the stall" occurs when evaporative cooling on the surface of the meat matches the heat input of the smoker. Do not panic and raise the heat; stay the course to ensure the collagen continues to break down into gelatin.
3. The Cubing and Saucing Protocol
Once the meat reaches an internal temperature of 88 degrees Celsius (190 degrees Fahrenheit), remove it from the heat. Use a bench scraper or a heavy chef knife to divide the beef into 2.5cm (1 inch) cubes. Place these cubes into a heavy-duty disposable aluminum pan.
Pro Tip: Cutting the meat at this specific temperature allows for clean edges before the meat becomes too tender to hold its shape. This increases the surface area for the secondary glaze application.
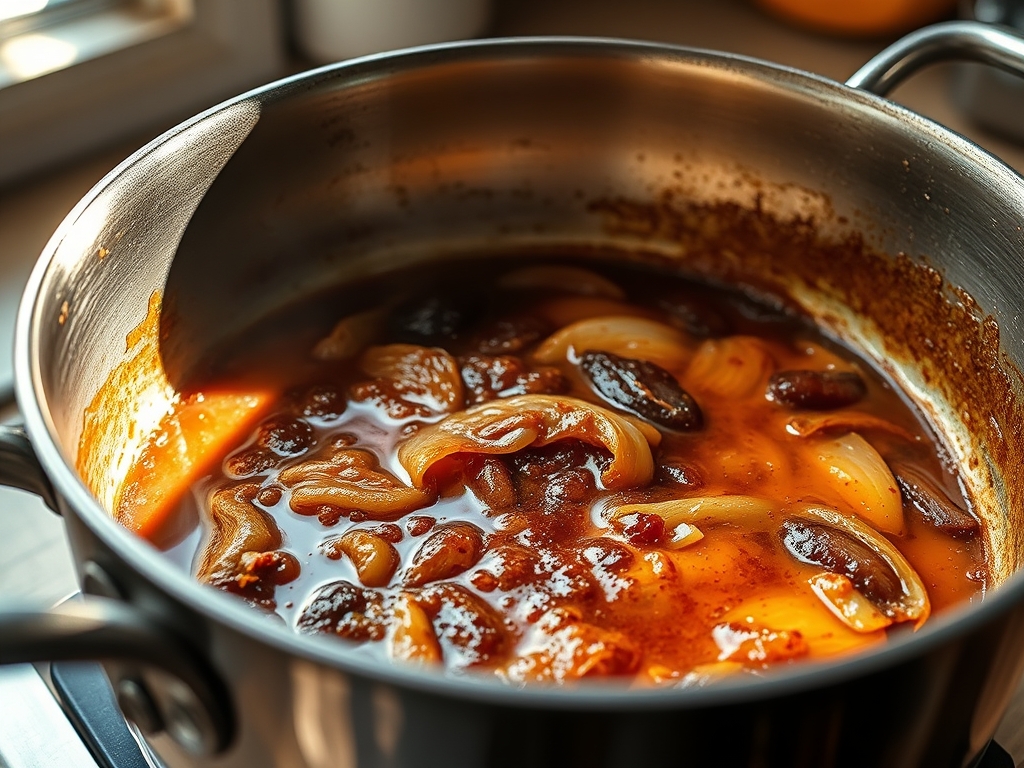
4. The Glaze Integration
Add your BBQ sauce, honey, butter, and beef broth to the pan. Toss the cubes until they are fully submerged in the liquid. This is where we infuse the meat with sweetness and fat. Cover the pan tightly with foil to create a pressurized steam environment.
Pro Tip: Use a saucier to pre-heat your glaze components before adding them to the meat. This prevents a "thermal shock" that could tighten the muscle fibers and stall the rendering process.
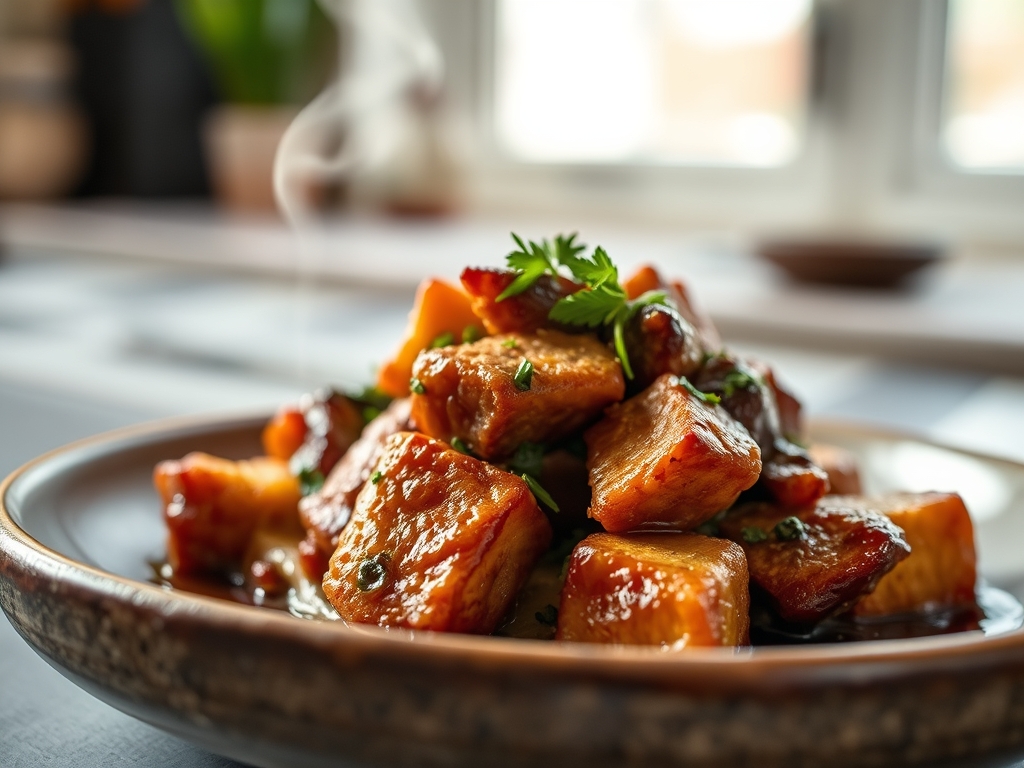
5. The Final Carbonization
Remove the foil for the final 60 to 90 minutes of cooking. This allows the sugars in the sauce to caramelize and the liquids to reduce into a piquant and sticky coating. The edges of the beef should begin to darken and slightly char.
Pro Tip: Monitor the viscosity of the sauce closely. If it becomes too thick, deglaze the pan with a splash of apple cider vinegar or more bone broth to maintain the perfect coating consistency.
Section B: Prep & Timing Fault-Lines:
Timing is the most volatile variable in this audit. Many cooks pull the meat too early because they fear the dark color is a sign of burning. In reality, that dark "bark" is a sign of complex flavor development. If your meat is tough, you haven't reached the internal temperature required for collagen conversion. Technical Fix: Always cook to feel and temperature, never to a strict clock. If you are behind schedule, do not crank the heat; instead, wrap the meat in butcher paper to accelerate the process without ruining the bark.
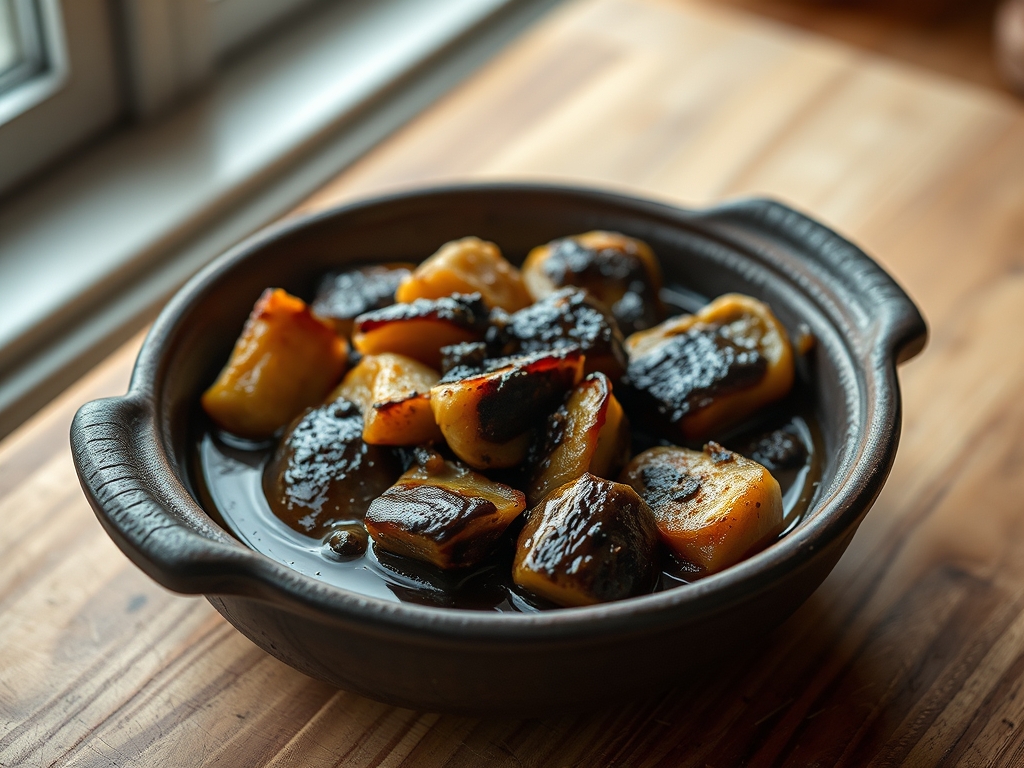
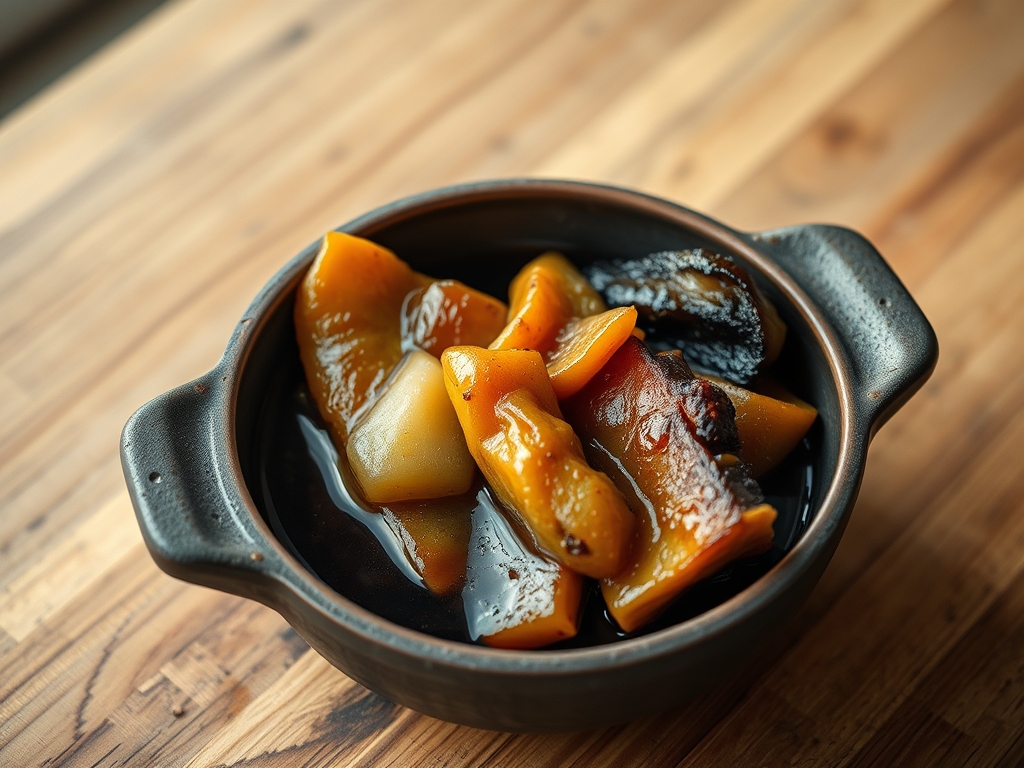
THE VISUAL SPECTRUM
Section C: Thermal & Visual Troubleshooting:
Look at the Masterclass photo. Notice the deep mahogany hue and the way the sauce clings to the meat without pooling at the bottom. If your burnt ends look grey or pale, you likely lacked enough wood smoke or your rub lacked sugar for caramelization. If the cubes look "shaggy" or are falling apart, you overcooked them in the braising phase. Technical Fix: For dull colors, increase the humidity in your smoker by adding a water pan. This keeps the surface of the meat tacky, allowing more smoke particles to adhere. For incorrect textures, ensure your cubes are uniform in size; uneven cuts lead to uneven thermal absorption.
THE DEEP DIVE
Macro Nutrition Profile:
Burnt ends are a high-lipid, high-protein fuel source. A standard 150g serving contains approximately 450 calories, 32g of fat, 28g of protein, and 12g of carbohydrates (largely from the sugar in the glaze).
Dietary Swaps:
- Keto: Replace the honey and BBQ sauce with a sugar-free alternative and increase the butter content.
- Vegan: Use large chunks of smoked King Oyster mushroom or seitan, though the rendering science will differ significantly.
- GF: Ensure your BBQ sauce and beef broth are certified gluten-free, as many commercial thickeners contain wheat.
Meal Prep & Reheating Science:
To maintain the molecular structure, do not microwave. The high-intensity waves will turn the gelatin back into a rubbery mess. Reheat in a 150 degree Celsius (300 degree Fahrenheit) oven, covered with foil, adding a tablespoon of water to aerate the steam and prevent the sugars from scorching.
THE KITCHEN TABLE
Why are my burnt ends tough?
You likely failed to reach the target internal temperature of 93 to 95 degrees Celsius. Collagen requires sustained heat to transform into gelatin. Use a digital probe to verify the thermal core before pulling the meat.
Can I use a different cut of meat?
Yes, chuck roast is a fantastic alternative to brisket point. It has a similar fat-to-lean ratio and high collagen content, making it perfect for the long rendering process required for Burnt Ends Infrastructure.
What wood provides the best smoke profile?
For beef, use heavy hardwoods like oak or hickory. These provide a robust flavor that can stand up to the high fat content and the sweetness of the carbonized glaze. Avoid light fruitwoods like apple for this specific dish.
How do I get a better bark?
Increase the coarse black pepper in your rub and ensure you aren't spritzing the meat too often. Surface moisture is the enemy of a crunchy bark; let the heat do the work of drying the exterior.